A Simple Guide to Installing LED Spotlights
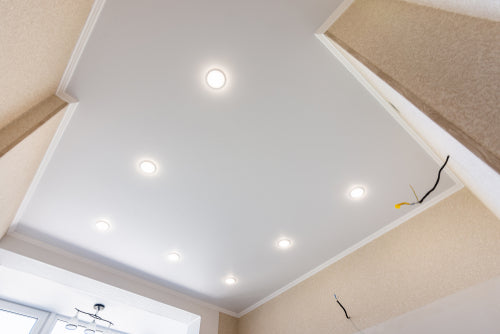
Ceiling spotlights are perfect for bathrooms, kitchens, and living rooms. They provide task and accent lighting, uplifting the home and enhancing visibility for various activities.
If you’re looking to upgrade your existing lighting setup, this guide will walk you through the installation process for LED spotlights.
From planning and preparation to the final touches, Light Supplier has got you covered. Whether you’re a DIY enthusiast or a beginner, by the end of this blog, you will know how to fit spotlights into your ceiling with confidence.
For long-lasting LED lighting, browse our wide range of fixtures today.
What You'll Need
- Tape measure and chalk line
- Stud finder or bradawl
- Lighting cable
- Utility knife
- Pencil
- Cordless drill and hole saw set
- Spotlights
- Screwdriver
PPE: When working with electrical equipment, ensure that you wear safety goggles, gloves, and a dust mask to protect your eyes, mouth, and skin.
Planning Your Installation
Before we dive into how to install LED spotlights, you need to plan out your installation. This will make the process much easier and quicker.
How to Choose the Correct Number of Spotlights
The number of spotlights you need depends on the size of your ceiling and the level of brightness you desire.
As a guideline, spotlights are typically installed on every square meter of ceiling. This creates widespread and cohesive lighting for a visible space.
Kitchens and workspaces will require more recessed spotlights for a brighter environment.
Where to Position Your Spotlights
For spaces such as kitchens and offices, spotlights should be positioned over worktops to enhance visibility and reduce shadows whilst performing important tasks.
The lights should be spaced around 1.2 to 1.5 meters apart for a neat appearance and widespread lighting. Consider choosing dimmable spotlights to adjust the setting for different tasks.
A Step-by-Step to Installing Spotlights
Before starting with the installation process, ensure that the electricity supply is turned off to prevent electrical shock.
1. Plan Your Layout
Measure the length and width of your ceiling using a tape measure. Then, determine how many lights you need to achieve the desired level of brightness for the area.
Mark areas on your ceiling with a pencil as a guideline for each light. Overlap the beams of each spotlight slightly to avoid dark spots.
Use a stud finder to locate any joists to help you avoid obstructions when installing your LED spotlights. Consult with a professional if you’re unsure of the layout of your lights.
2. Cut the Holes
Using a drill, create a small hole in the middle of each marked spot to ensure there are no obstructions in the ceiling.
Then, attach the hole saw to your drill and position the pilot drill bit into the pre-drilled hole. Slowly, drill further into the hole, applying light pressure to avoid damaging the ceiling.
Check to make sure each hole is the right size for your small spotlights. Use a utility knife to fix any rough edges.
3. Wire the Spotlights
To wire your spotlights, route the cables from your main power supply to the position of each spotlight. Due to the technicality of this process, you may need help from a professional electrician.
If you’re replacing old spotlights, you might be able to use the existing wire routes. To prepare the wires, strip the end of the live (brown), earth (green/yellow), and neutral (blue) wire.
To connect the ceiling spotlights, connect the live wire to the L terminal, the earth wire to the earth terminal and the neutral wire to the N terminal. Follow the manufacturer’s guidelines to add any terminal blocks or connectors.
4. Fit the Spotlights
Ensure that the spotlights are connected to the electrical cable whilst the power is turned off.
If your recessed spotlights have spring clips, gently compress the clip and insert it into the pre-drilled hole. The clip will expand, holding the fixture in place.
For screw-in spotlights, align the thread of the spotlight into the pre-drilled base. Gently twist it by hand to catch the thread without cross-threading. Once the thread catches, continue to screw the spotlight into the base.
To install twist-lock spotlights, hold the spotlight up to the ceiling and carefully align the tabs or notches on the spotlight with the corresponding slots in the mounting base. Then, gently rotate the spotlight into place in the direction stated by the manufacturer.
You will hear a click when the LED spotlight is securely fitted in place.
5. Testing and Finishing Touches
Once all of the spotlights have been fitted, turn on the power supply to ensure each bulb is functioning correctly.
Check the connections or consult a professional if any flickering, dimming, or non-operation occurs.
Wipe down the spotlights with a dry cloth, then brush and vacuum the area to remove debris.
Invest in High-Quality Ceiling Spotlights with Light Supplier
At Light Supplier, our mission is to enhance the efficiency of UK homes whilst working towards energy savings and affordability.
All of our products use LED bulbs, which promise longevity and great performance. Our LED spotlights come in a range of designs for various buildings and preferences.
Whether you’re looking to illuminate a large area with track spotlights or invest in a large dimmable spotlight for a cosy atmosphere, we’ve got you covered.
Browse our spotlights today to invest in the competence of your home lighting.